 |
All photos by
Stacey Gonzalez Copyright©
|
This do-it-yourself craft is simple, inexpensive and is a great way to create a custom, one-of-a-kind room accent that is personalized just for you. What you need is an object with a smooth surface- ceramic, glass, plastic, wood or a hard surface are some of the best. Fabric or soft, fluffy surfaces do not work as well. In my case I used an old ceramic lamp to up-cycle into something new. I did a lamp for a women's room and a men's room. Below is the before- the yellow lamp- and after picture of what you can do.
All you need is the following: a "hard surface" home decor item, some sort of paper for decoration, Modge Podge from a local craft store, any type of sponge or paintbrush and scissors.
Make sure you have a clean work station. I used newspaper to cover my table. I also recommend having a dish cloth damp with warm water to clean the Modge Podge from your fingers as you go. The first lamp was for a woman's room with an "Antique Gypsy" theme. For that I used scrap-booking paper with a vintage print. I tore the edges instead of cutting it with scissors to give it a more antique look.
Be sure to use scrap-booking paper and not card stock if the object has curved edges like this lamp. If it is a flat surface with 90 degree angles then card stock can be used.
Use the sponge or brush to apply Modge Podge to the lamp and place the paper on the spot. Apply another layer of Modge Podge over the top of the piece of paper spreading it evenly.
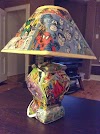
The second lamp is for a man-cave or games room. In this case I used old comic books and cut the paper in sharp, straight lines to look more modern. I recommend sorting your pictures into two piles- one pile for less interesting pictures to cover the whole background and the second for pictures you like the most to stand out up front.
Take the less interesting background pictures and use the same technique to apply them to the surface. Cover the entire surface with the less interesting art before applying your main focal point art. Its good to have at least one main picture on each side of the lamp.
In the case of the comic book lamp I decided to decorate the lamp shade using larger pictures. This proved to be more difficult because the lamp shade had a fabric like texture- this is why I would recommend a smooth plastic lamp shade.
Once you have covered the old lamp surface and your design is complete apply one last coat of the glue and smooth out all the surfaces pressing down any folds with your fingers. To better wrap paper around rounded edges just put a small tear in the paper and fold it inward slightly.
Let the lamp dry completely. Once dry apply another coat to the whole surface- smoothing it out with a fresh sponge or clean brush. Repeat until desired finish. Modge Podge comes in many finishes including both matte and glossy. Let it dry and you have a one of a kind piece personalized to suite your room.
art
comic books
comics
craft
crafts
DC Comics
decor
DIY
home
lamp
Marvel
Modge Podge
Ninja Turtles
paper
paper crafts
scrapbooking
Spiderman
The Avengers
tutorial


0 Comentarios